Restricted User Access
Restricted user access is accomplished with restricted user roles. This section covers the configuration and application of restricted user roles.
- How to setup a restricted user role.
- How to apply it to a user.
Restricted users roles allow an Administrator to restrict a user to a subset of projects within an organization. It also allows an administrator to select from a list of actions that the user will be allowed to perform.
Setup a new organization role
If this is the first time a user of this type is being invited to an organization a new role with limited access needs to be created.
Navigate to the Organization > Settings > Member Roles
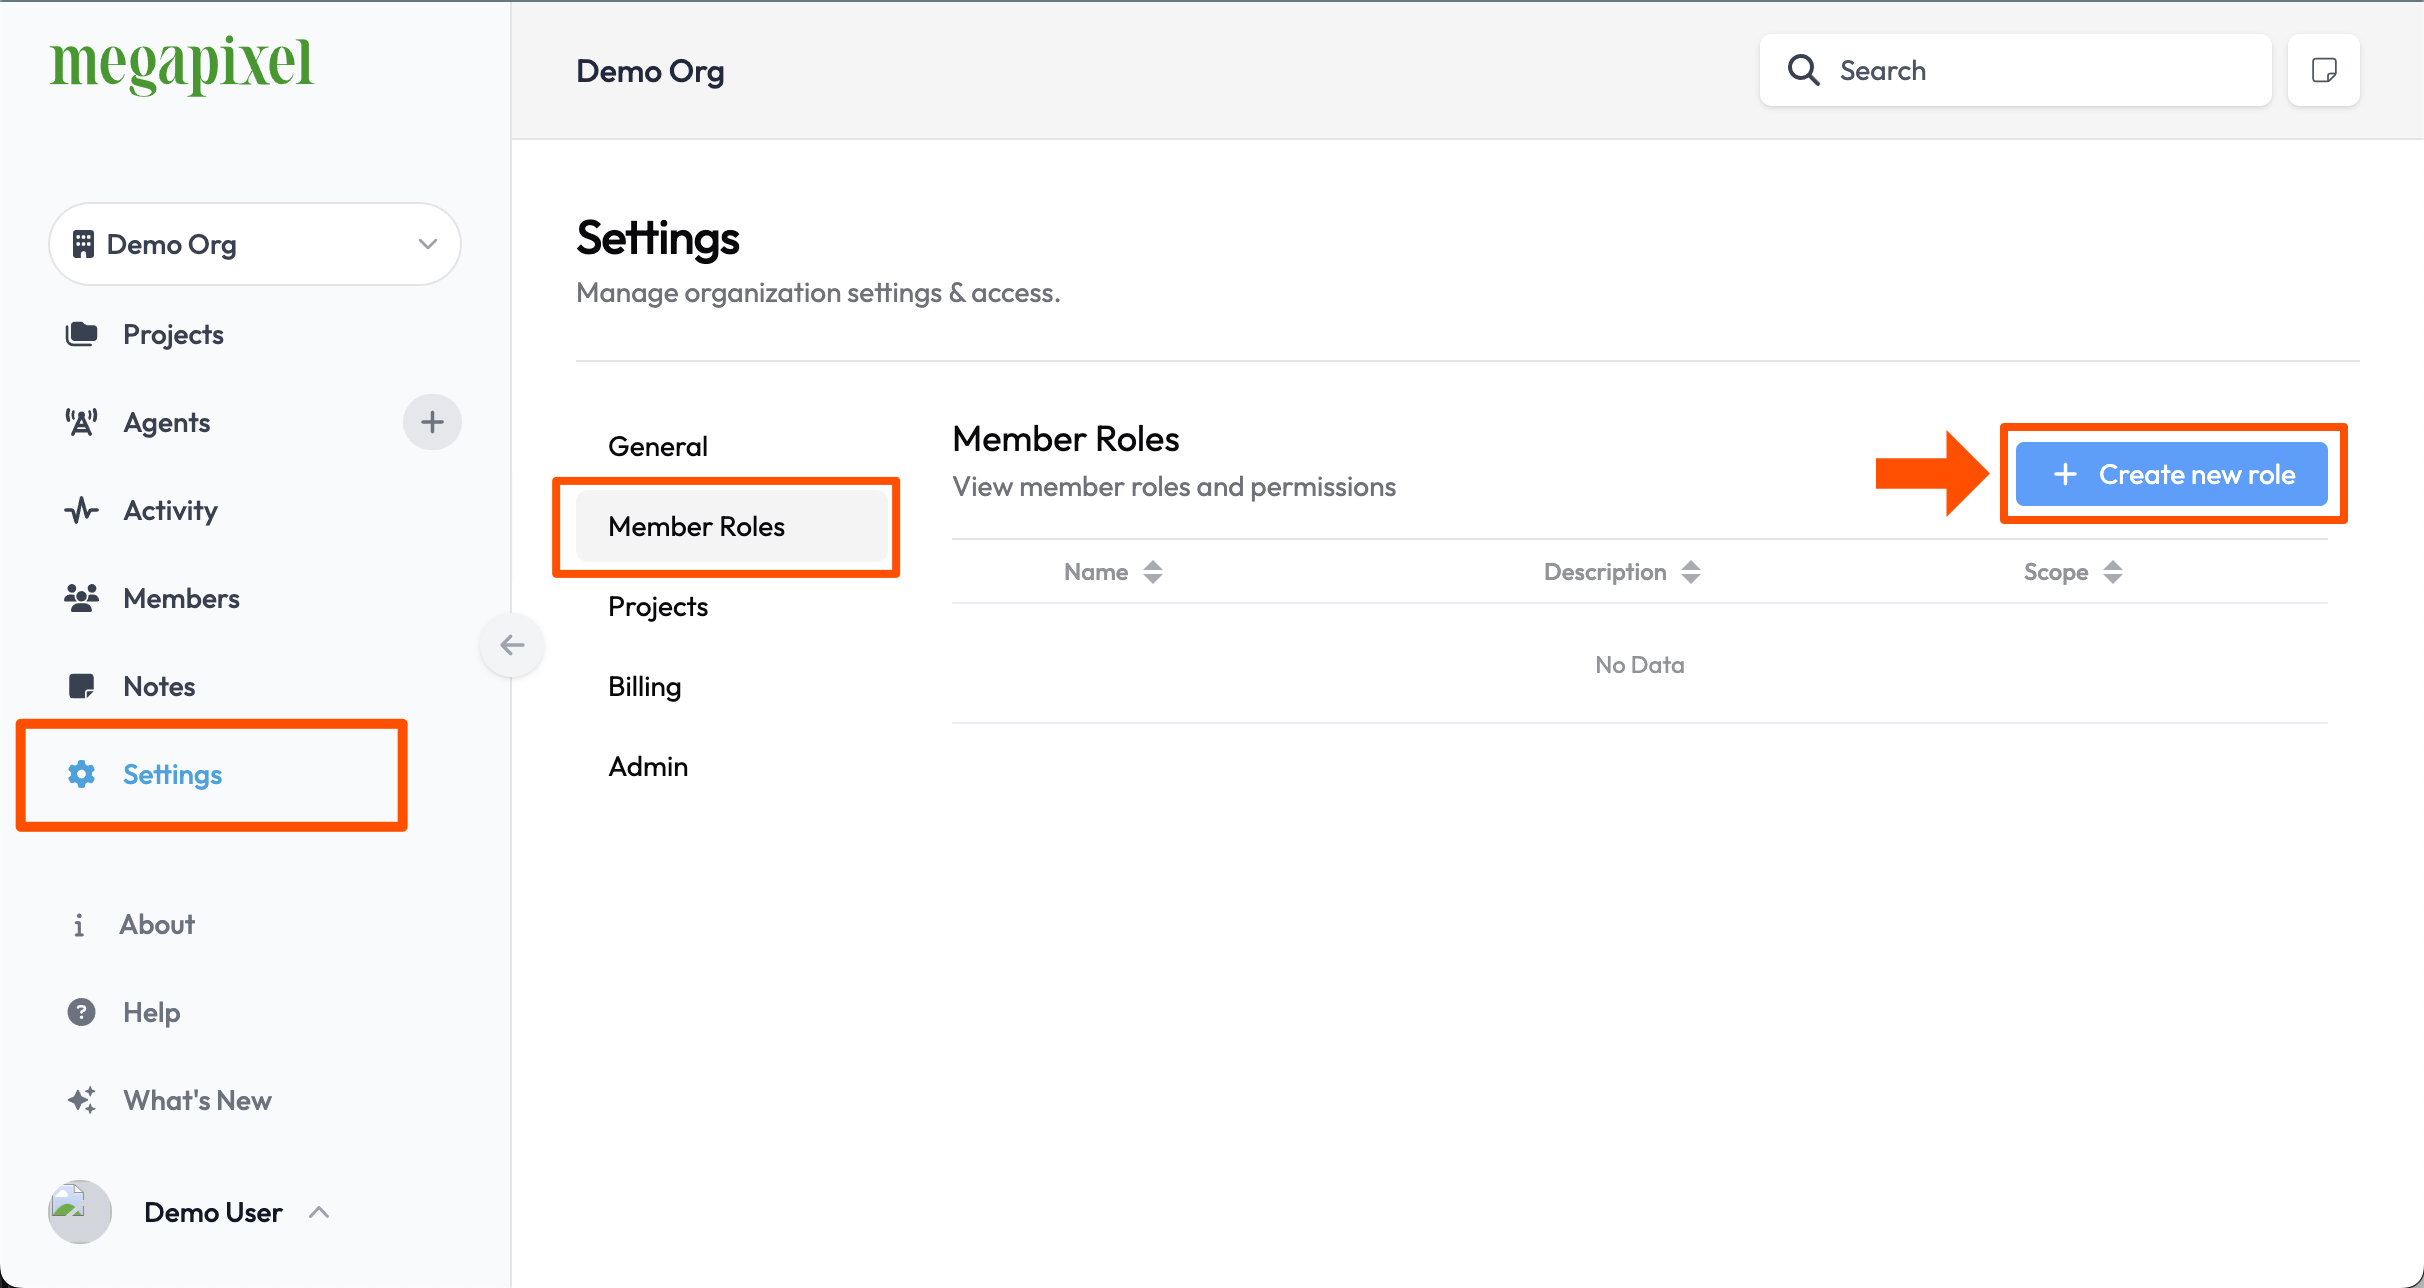
Use the + Create new role button to open a modal dialog window.
Enter the following details:
- Name: “Restricted Organization Role” (or as desired)
- Scope: Organization
- Permissions: org.view - Access and view an organization
- Assignable by: Organization admin (default)
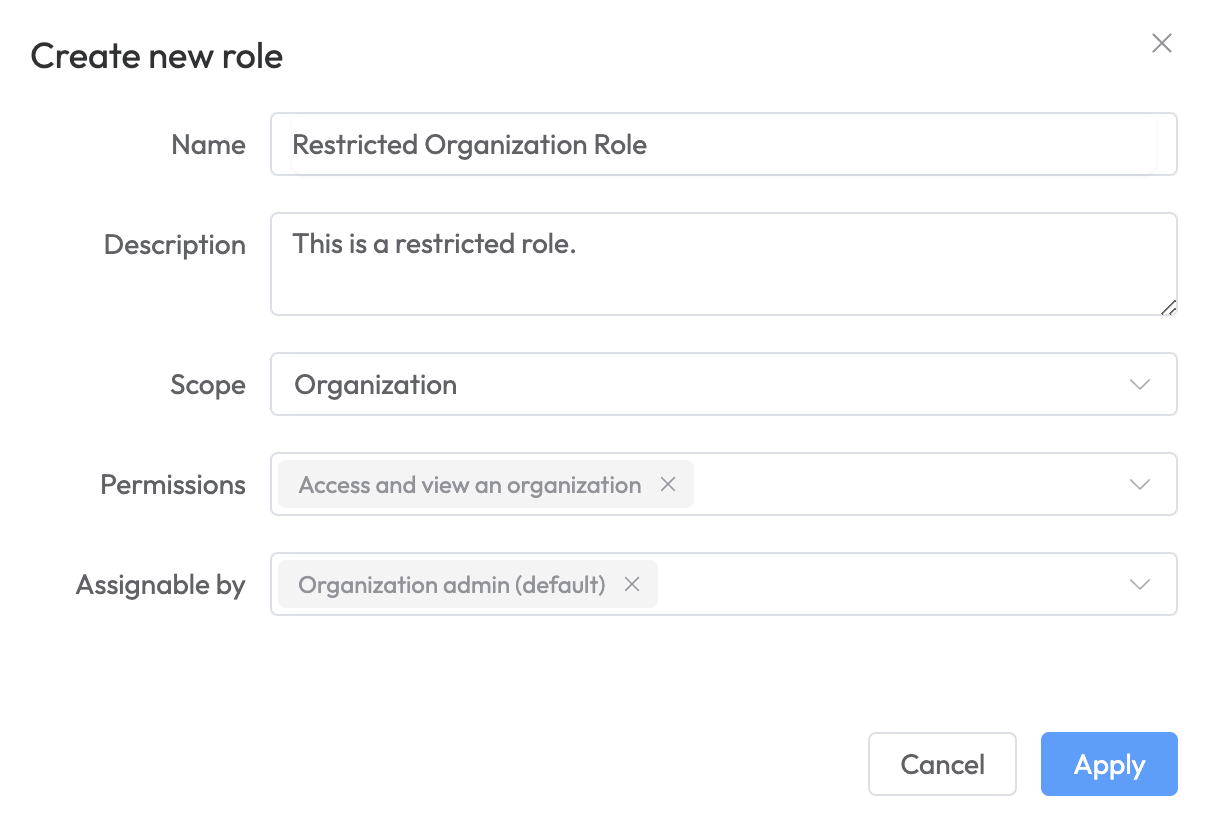
Press Apply to save the role. Then, close the window.
Invite new users
Navigate to to the Organization > Members area to invite the new users. Ensure the new Restricted Organization Role is selected.
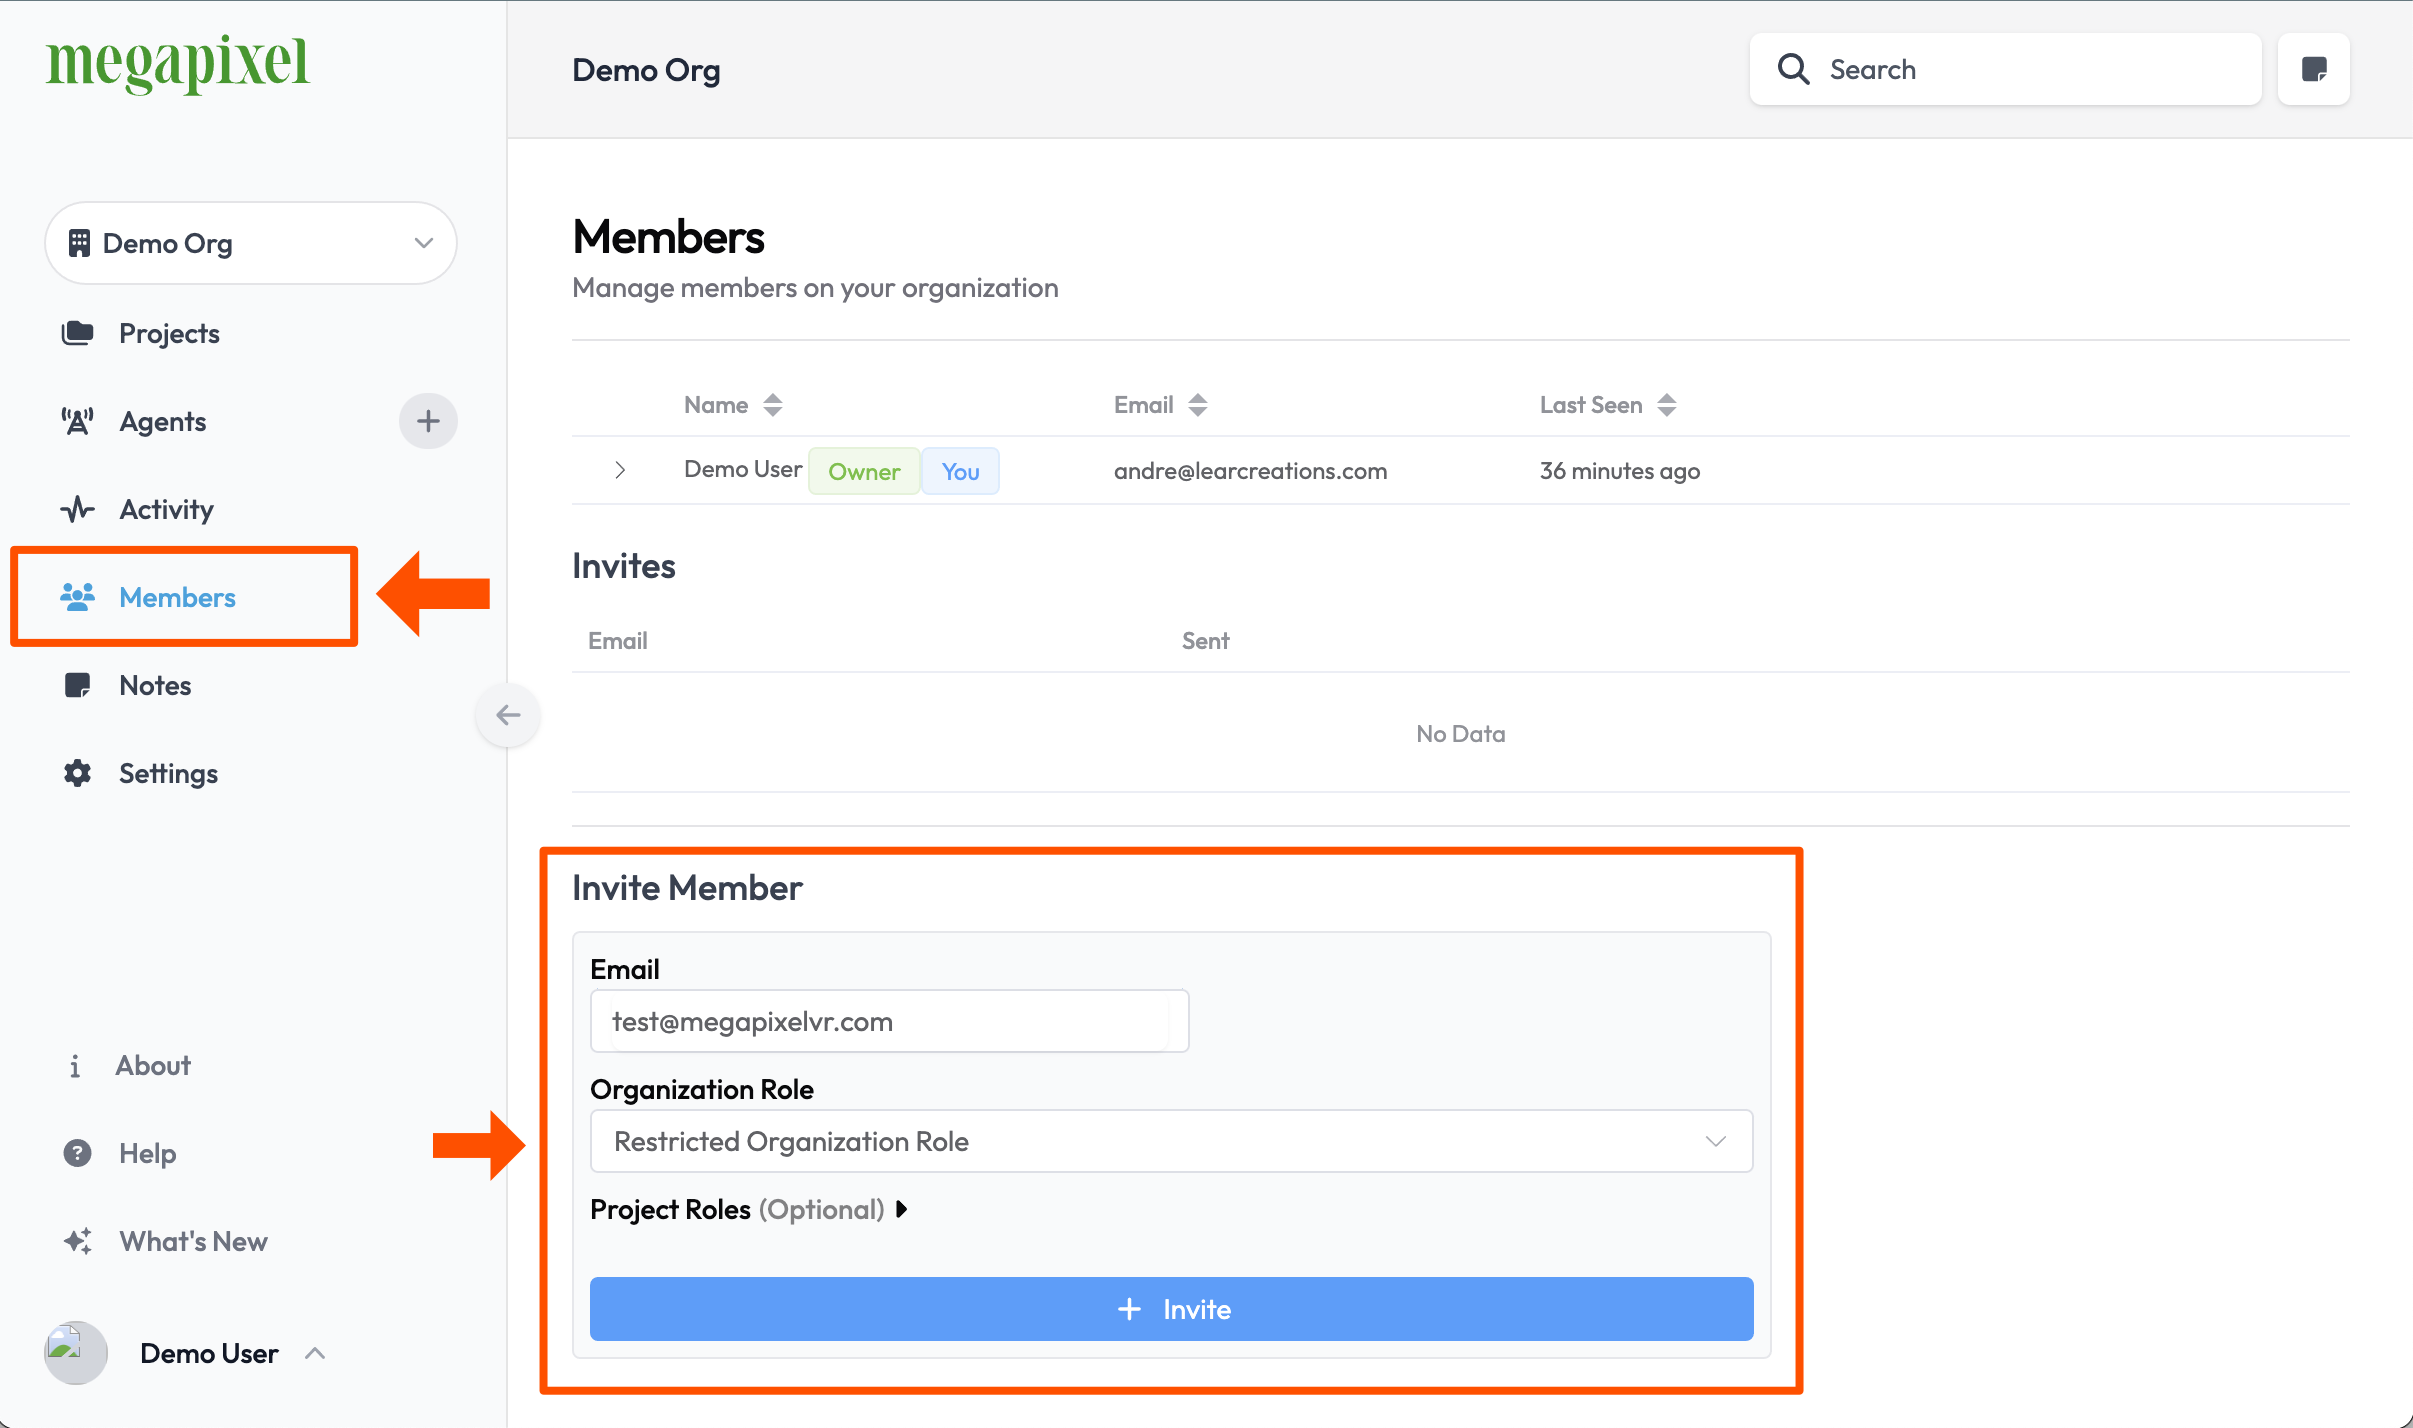
The Project roles can also be specified at this stage. For example, if we wanted to grant viewer access only to a sub-set of projects, the invite form would look like:
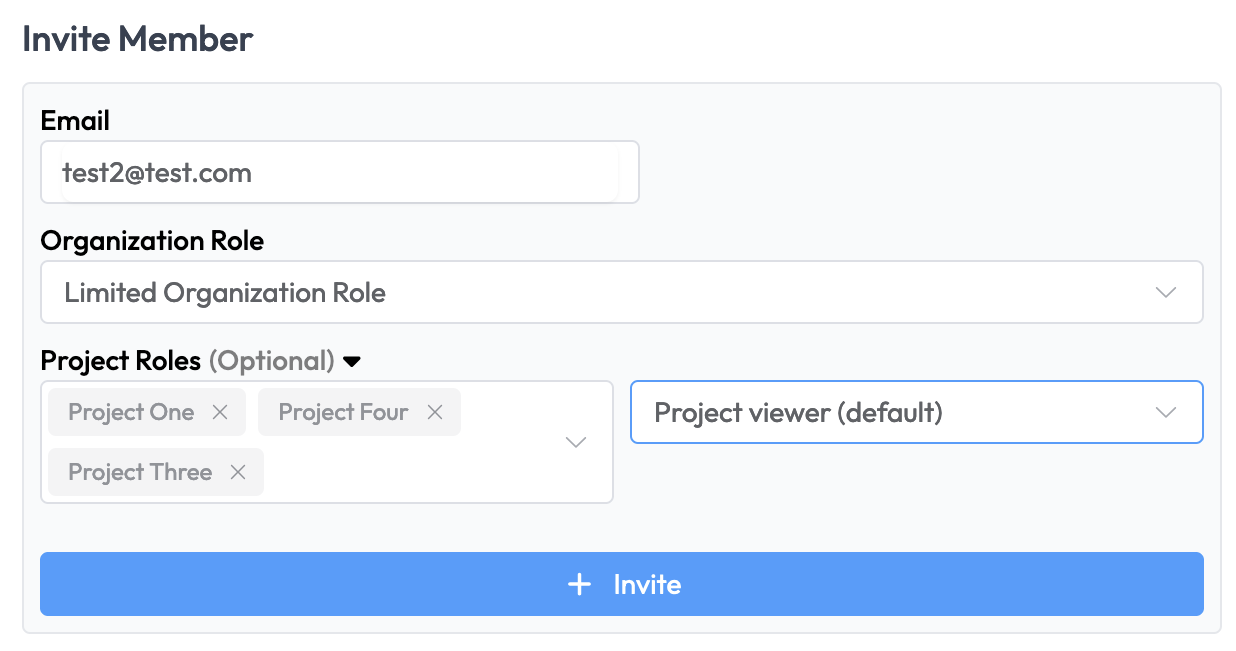
Press the + Invite button to invite the user. When the user redeems the invitation it will grant them the appropriate Organization and Project roles as defined.
Edit project Roles
If needed, Project roles for a user can be further adjusted on a per-project basis, via the Organization > Settings > Projects > Cog (Icon button).
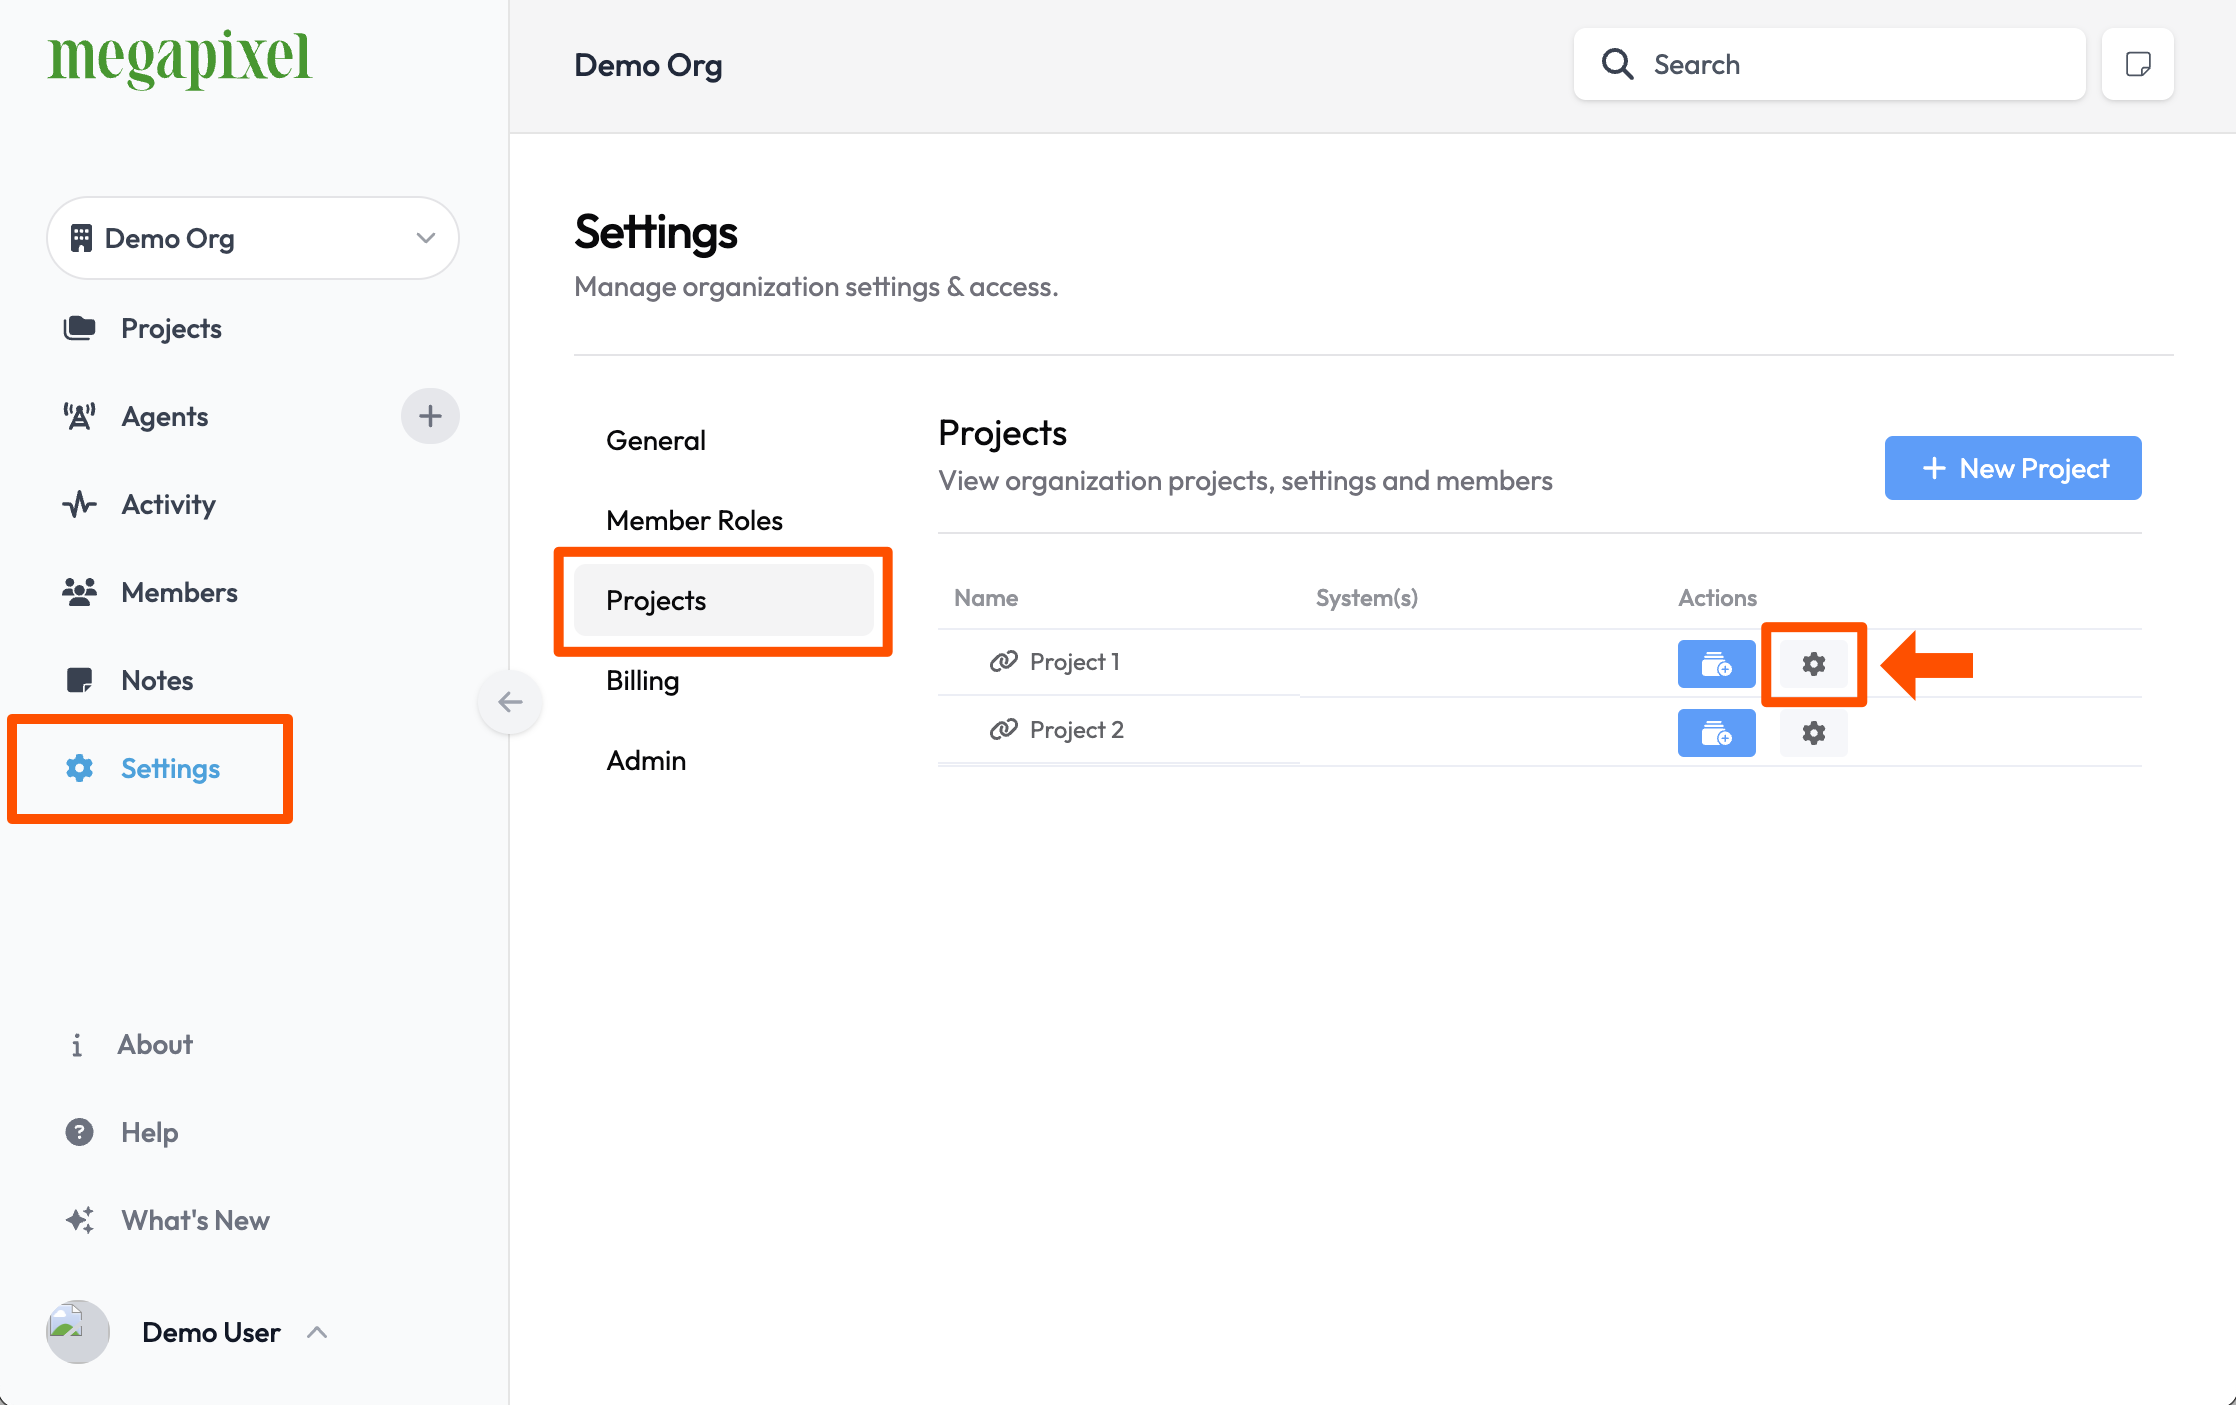
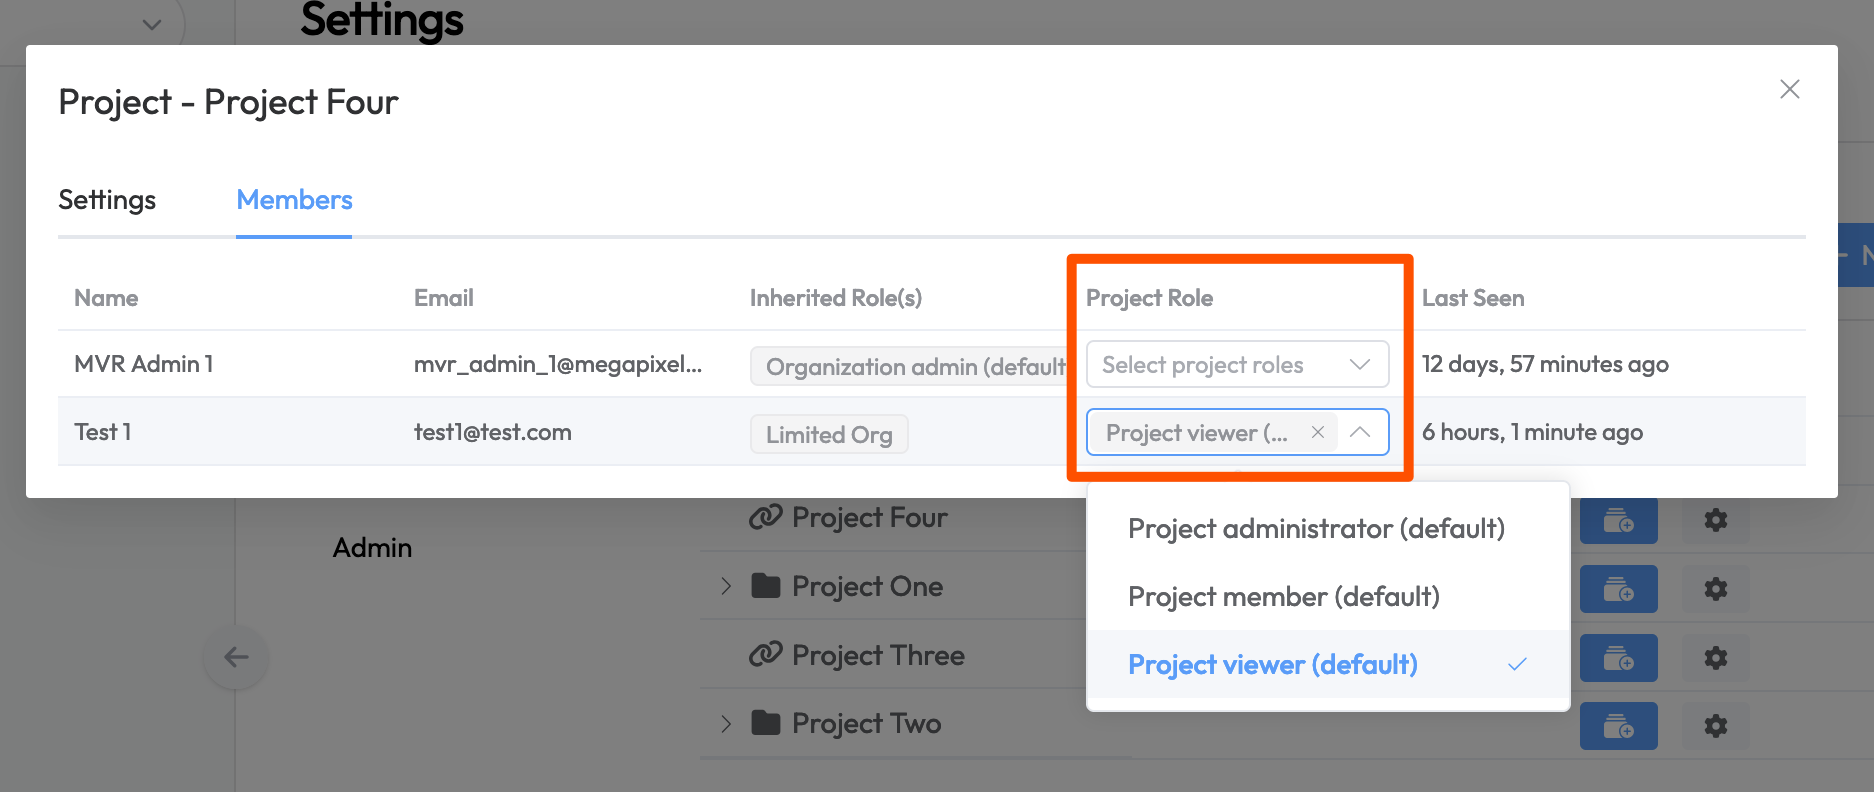
When the modal window opens on the Members tab, there is a Project Role drop down menu for assigning a Project Role.
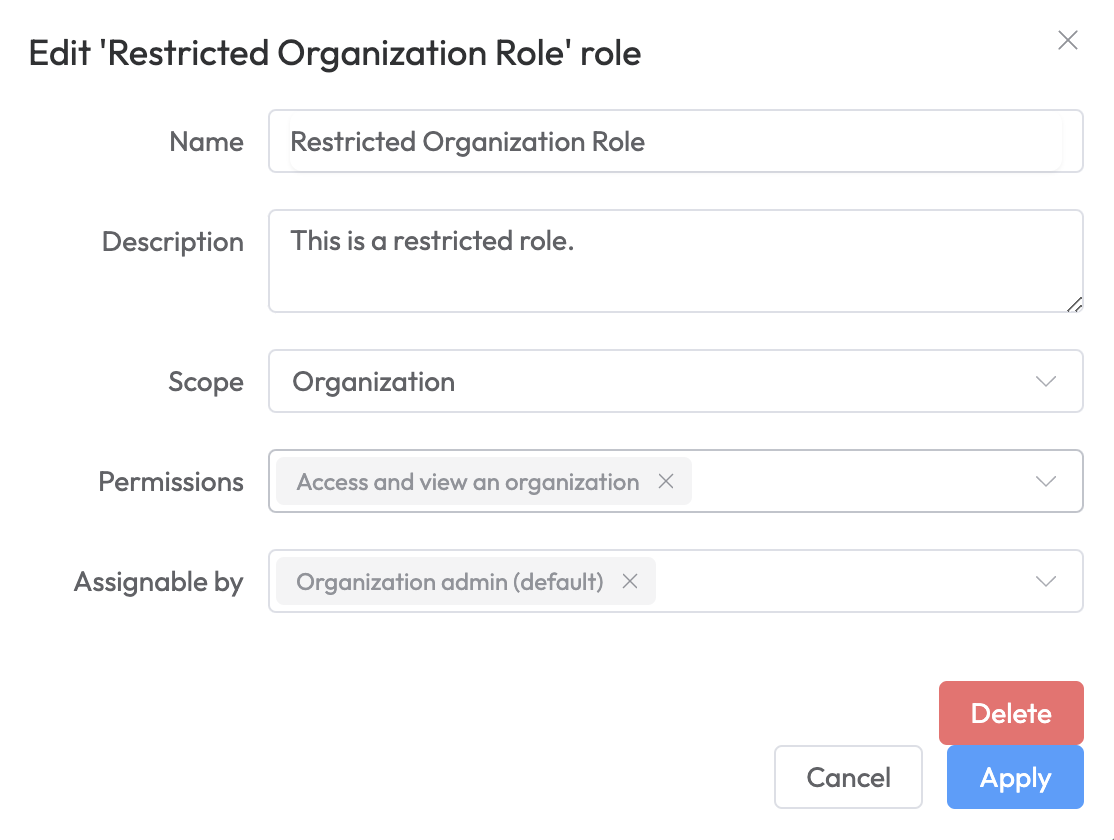
Edit / Delete Member Roles
Member Roles can be edited or deleted via the edit (pencil) icon botton on the right side of the Settings > Member Roles window. If the app window is set to a narrow width you may need to scroll to the right to see the edit (pencil) icon button.
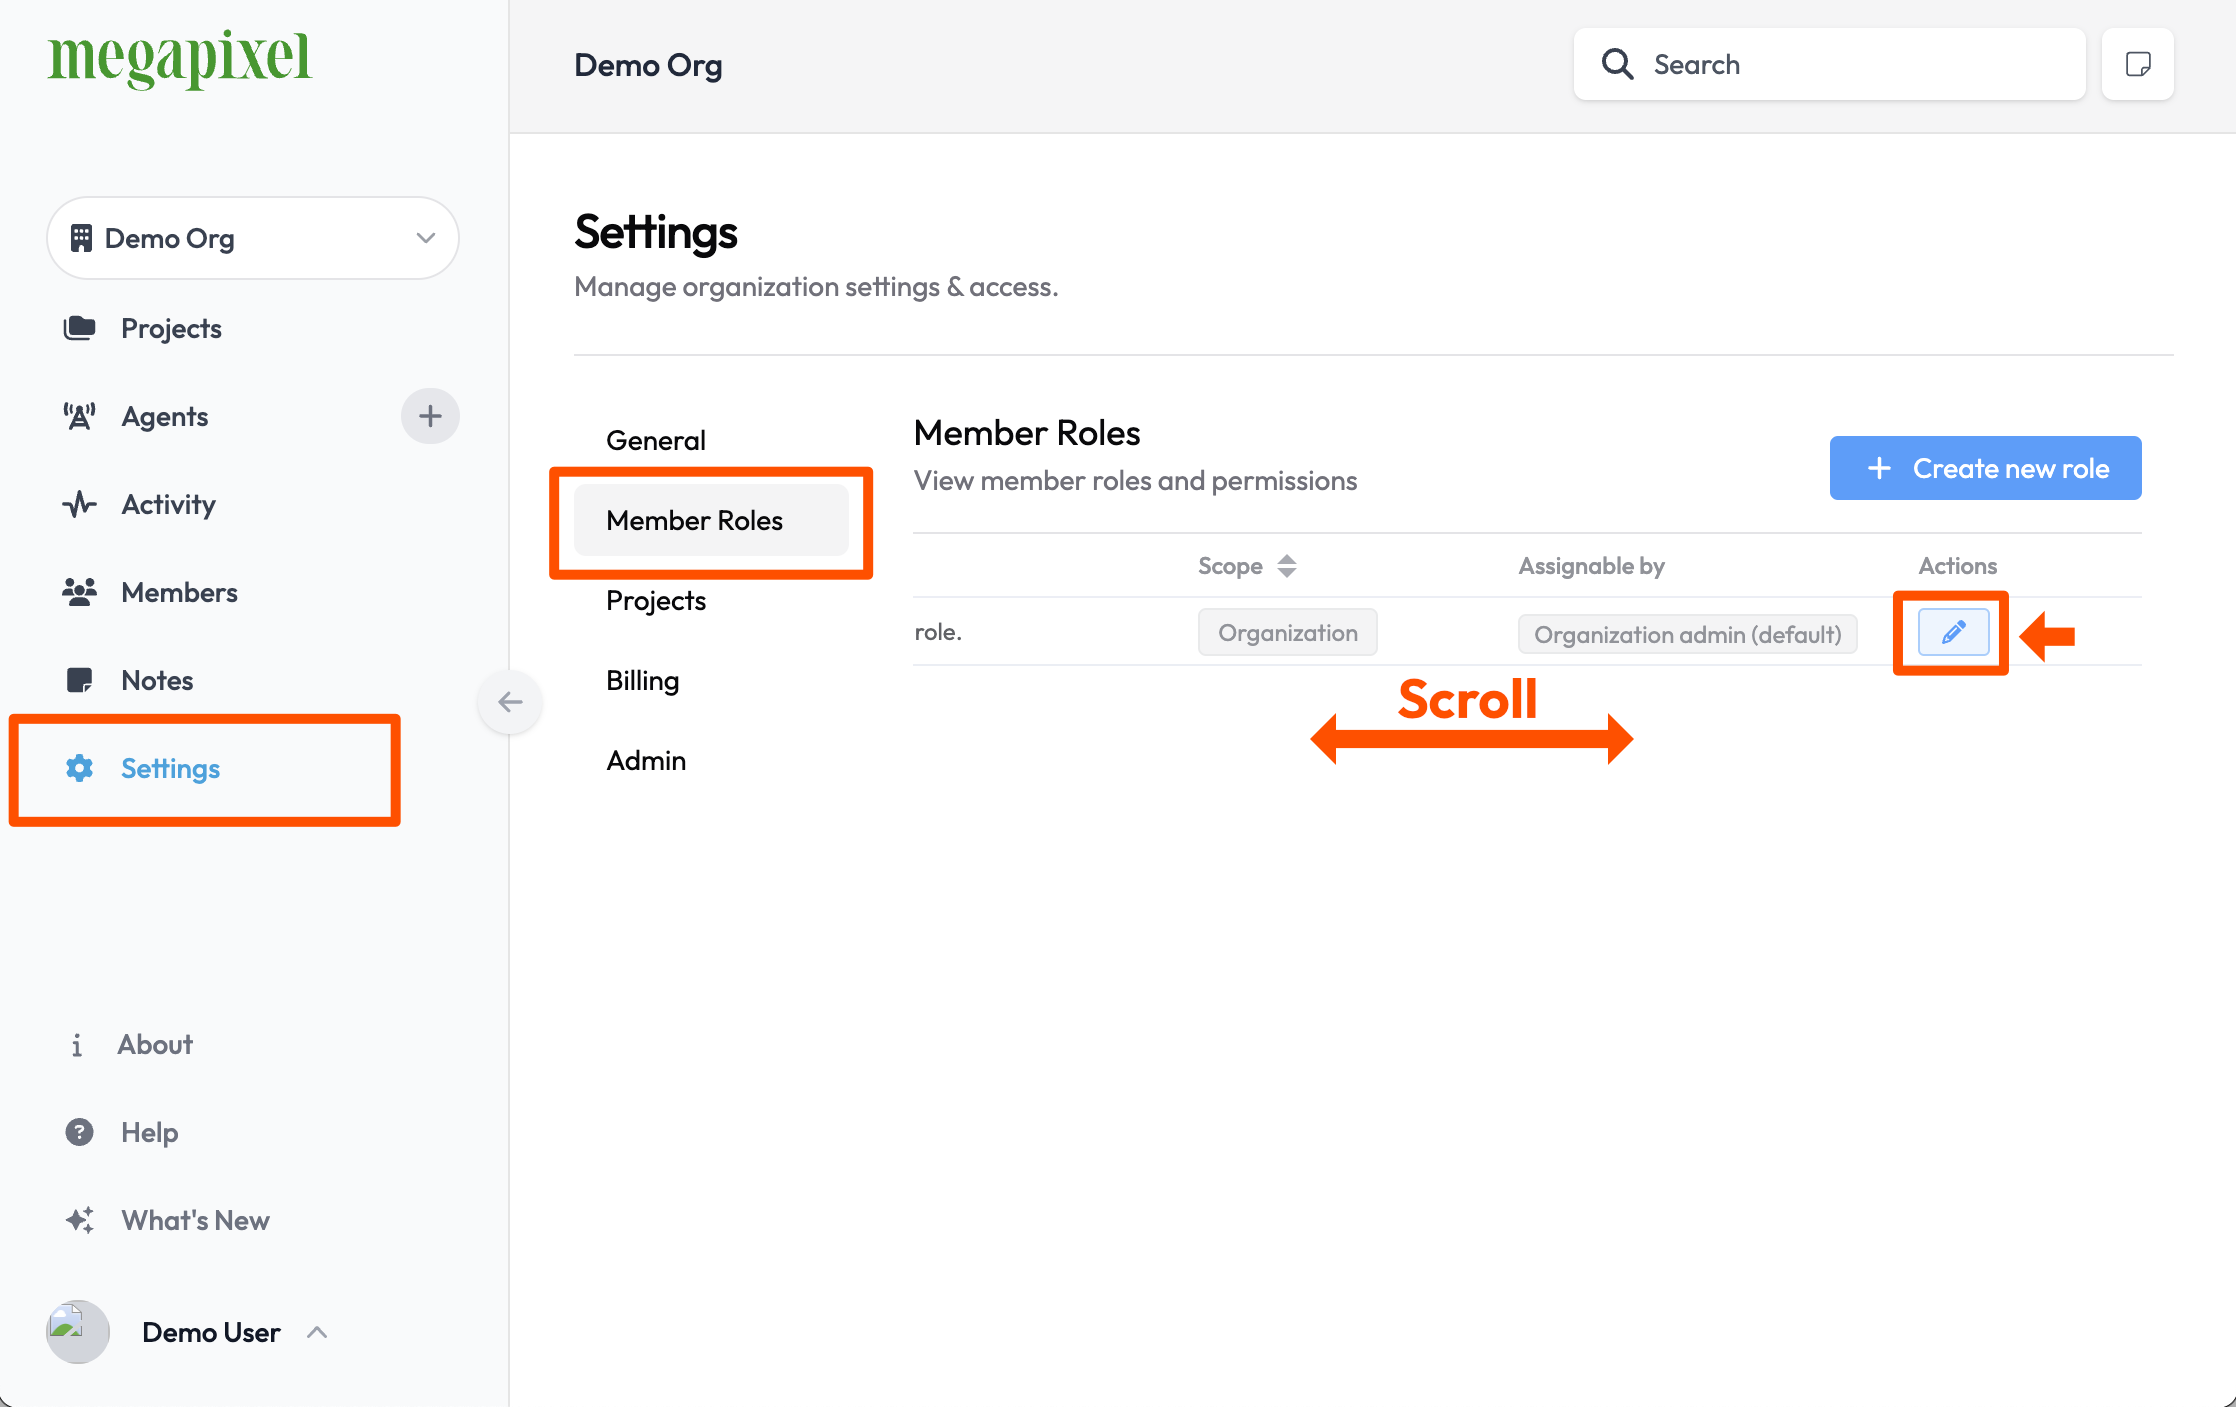
Edit fields as needed. Press Apply to save or Delete to eliminate the role.
